Awesome , love great deals <3
Sunday, November 18, 2012
Skull clutch, skull necklace and spike bracelet
http://www.batoko.com/collections/accessories
 Skull Stud Clutch £22.00
 £7.00
£7.00
 Skull Stud Clutch £22.00
Cross Drop Ear Cuff
£10.00

 £7.00
£7.00
£12.00 

Skull shirt , Tiger Cross shirt , Bone Leggings and Spiked leggings and more
Here is one of my favorite sites <3
I love love love their clothes... i got three different pieces for Christmas and get asked all the time where I got my shirts from.. this is the site
Its a UK site full of trendy and stylish clothes... if your looking for unique pieces to add to your wardrobe check this site out , you won't be disappointed
 £18.00
 £22.00
 £24.00

 £24.00 <3
This site that all these clothes can be found at it called www.batoko.com
I love love love their clothes... i got three different pieces for Christmas and get asked all the time where I got my shirts from.. this is the site
Its a UK site full of trendy and stylish clothes... if your looking for unique pieces to add to your wardrobe check this site out , you won't be disappointed
 £18.00
£18.00

 £22.00
£28.00

 £24.00

 £24.00 <3
This site that all these clothes can be found at it called www.batoko.com
DIY Ombre Studded Shoulder Sweater (Credit to: Gwen McMullin)
Credit to: Gwen McMullin
DIY Ombre Studded Shoulder Sweater
About a week ago I made this dip-dye ombre studded shoulder sweater inspired by the current Topshop version. It's very easy to do, will save you a fair bit of money and looks just as good.
If you've seen my post on dip dying a denim jacket, you might remember me mentioning I had dip dyed a few other items as well, and this grey sweater was one of them!
Here's the famous Topshop studded shoulder sweater, and some other ombre/dip-dye trends I was inspired by...
What You Need:
(All these items can be purchased on ebay and I've included links to the sellers I bought from.)
How to Ombre Dip-Dye Your Sweater
Follow the same steps in my diy ombre denim jacket to learn how to dip dye fabric.
Studding the Shoulders
Flatten out one shoulder so you can see the area your working with. Place the first stud on the shoulder seam close to the neck. Stab it through and carefully fold back the prongs with your fingers/nails or a knife.
Place the next three studs all along this seam.
Follow the images below to work out a triangle pattern.
Don't worry if its not perfect, just keep the spacing between each stud fairly even.
I used 20 studs on each shoulder.

Repeat these steps on the other shoulder - take care to fold the prongs neatly so they don't poke out at you when being worn. I tucked mine right into the fabric and I can't feel them when I'm wearing the sweater.

Broke City... =)
This site has really cute jackets for everyday wear and nice blouses for going out
$32.00
$36.00
$21.00
$25.00
$36.00
DIY Spine dress
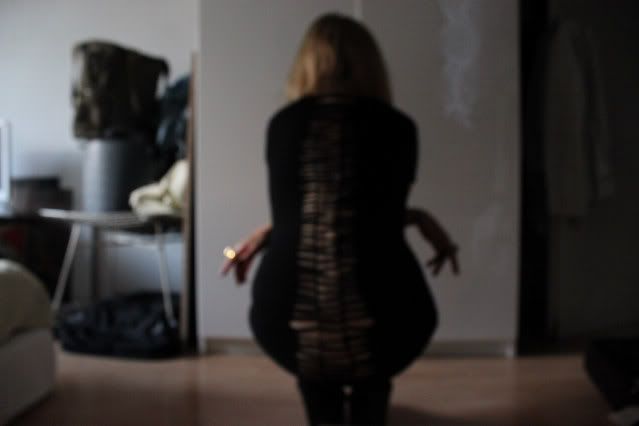
DIY Spine dress, easy as a pie
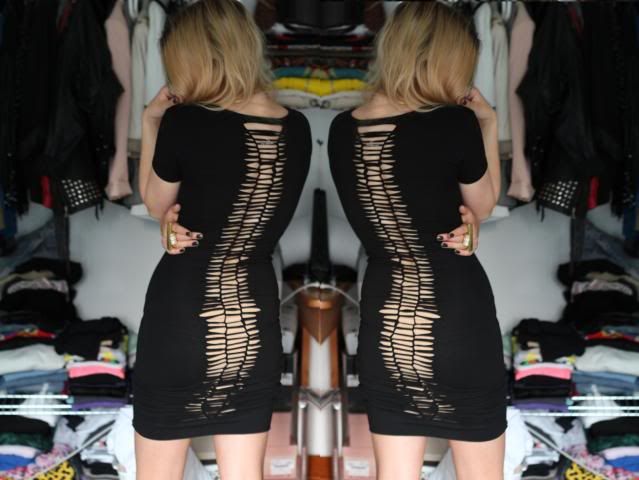

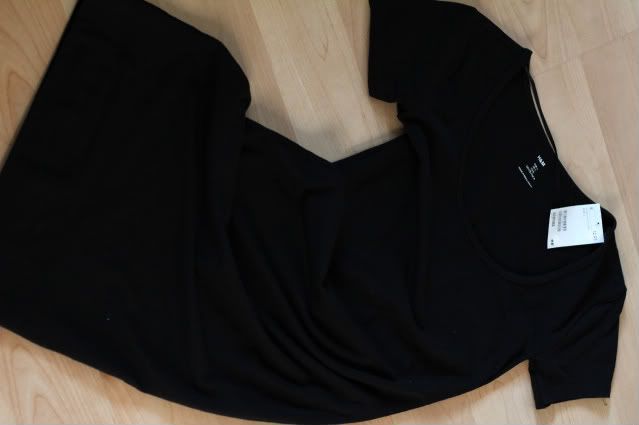
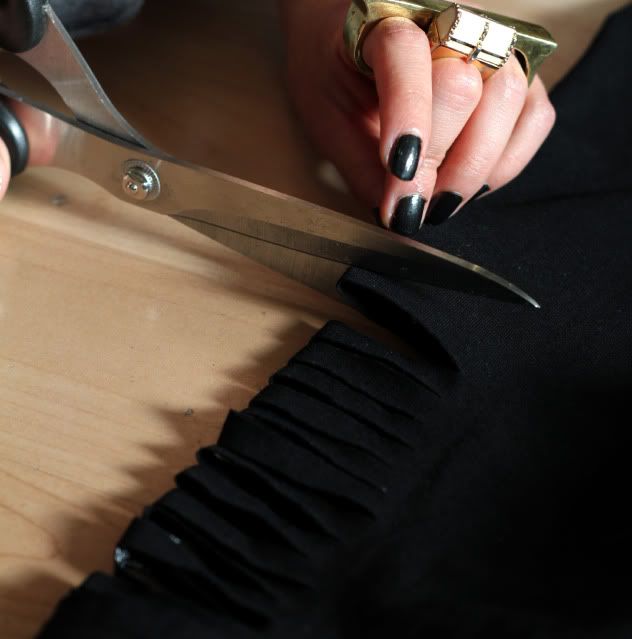
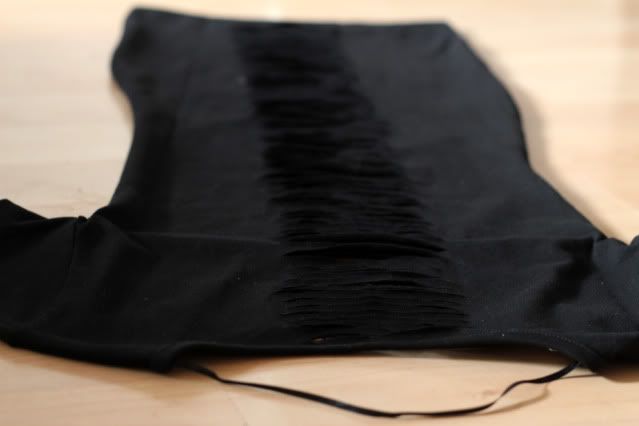
Spinedress Recipe,
easy as a pie!
Ingredients:
-H&M stretch dress (EUR 12.95)
-scissors
-needle thread
Preparation time: 15 min.
Fold the dress in half, but do this sideways.
Make sure the side seems touch each other so you know
exactly what the middle of your back will be.
Slice the dress in slices of approximately 5 mm thickness.
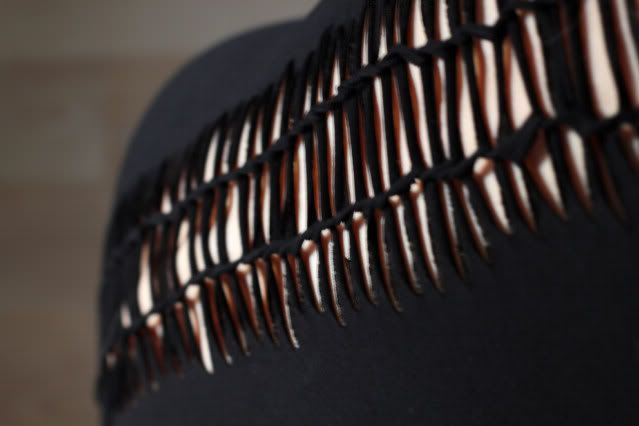
Unfold the dress and notice all the small 'ribbons'.
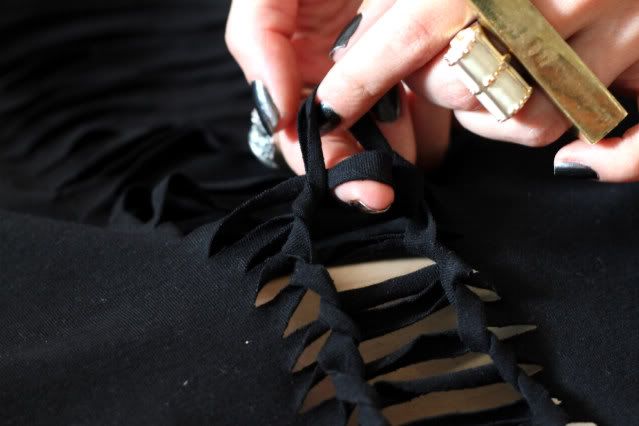
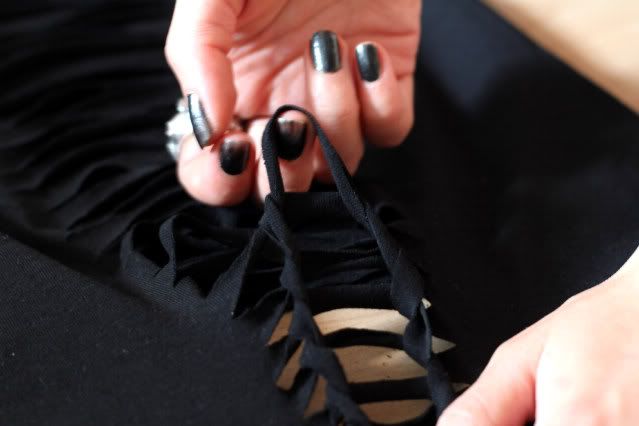
Now take the first top ribbon and pull the ribbon below through it,
do the same with the ribbon below and go on until the bottom.
Sew the last ribbon in place and... voila!
*I'm wearing an American Apparel nude skirt underneath
DIY | Leather - See Through Envelope
http://love-aesthetics.blogspot.co.uk
DIY | Leather - See Through Envelope
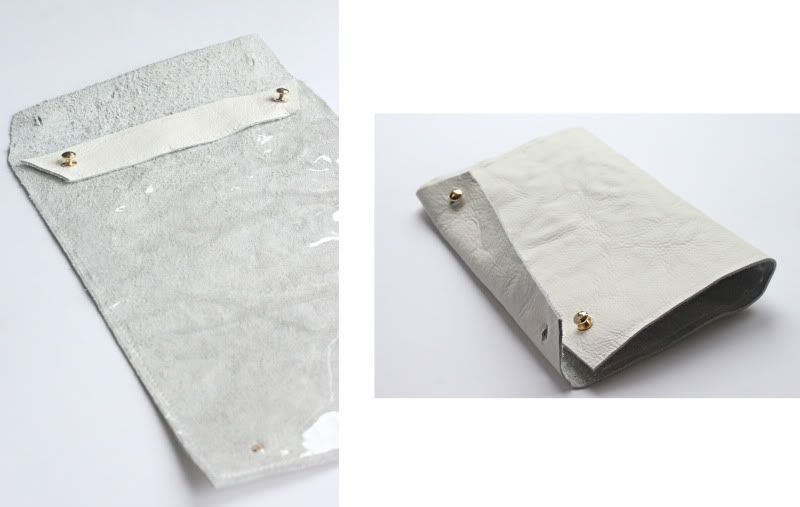
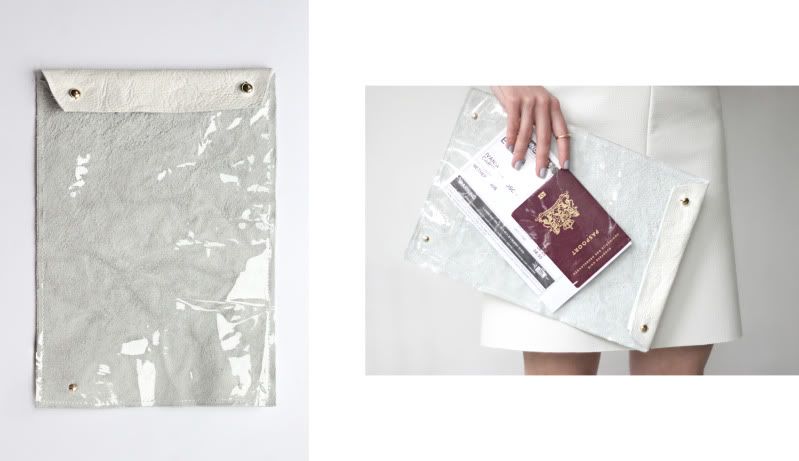
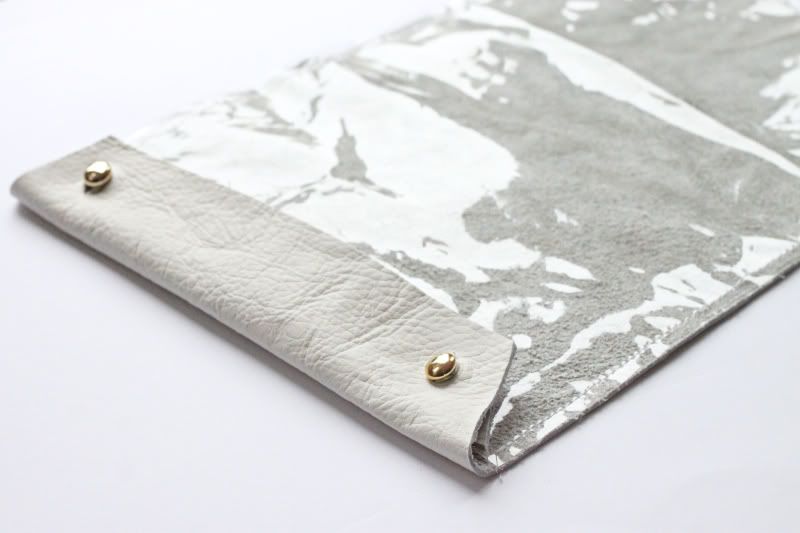
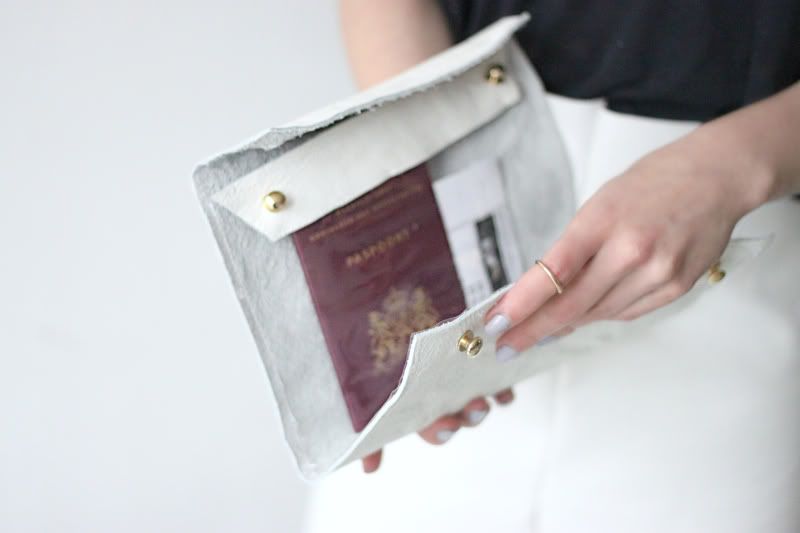
Foldable document map/ travel bag/ clutch/ whatever you want to call it or use it for, I bases this design on an envelope and used my two favorite materials to make it; clear plastic and white leather. During my last trip to Stockholm I used it to keep my important documents safe, and it was a joy to get it out of my bag every time!
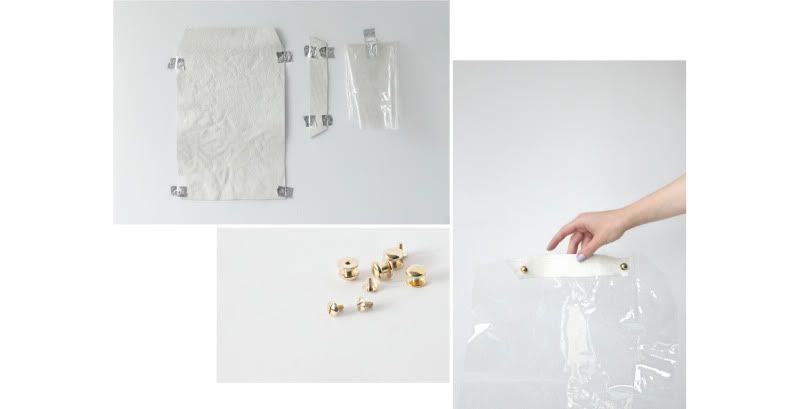
-leather
-4 button studs
-clear plastic
-sewing machine/needle thread
Nº1
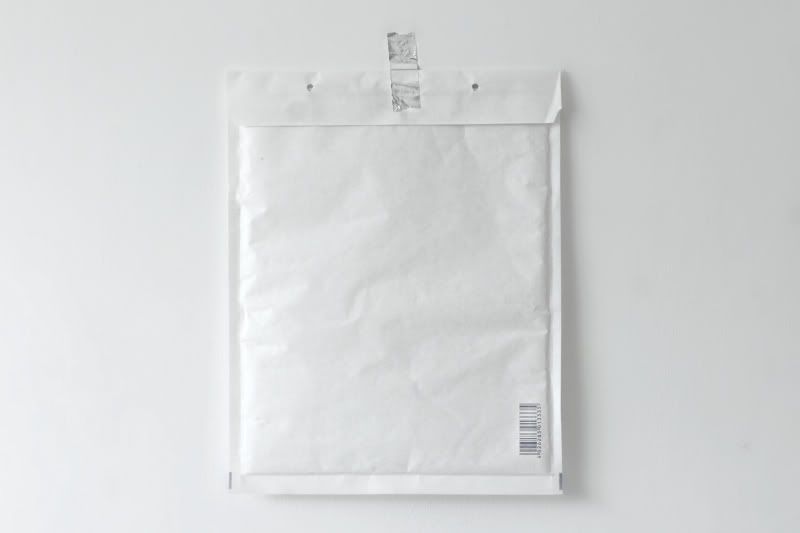
Fold the envelope open and trace it on the leather. Also trace the little flap one more time and cut both out.
Nº2
Make two holes in the small piece of leather and screw on the button studs. Sew this piece with the attached button studs onto an edge of the clear plastic. You can use any type of good quality thread and a special needle for leather. Make sure the stitches aren't too close together though, as this could cause the plastic to rip.
Nº3
Attach the second pair of button studs to the bottom of the main large piece of leather. They should be exactly as far apart as the ones on the little flap.
Nº4
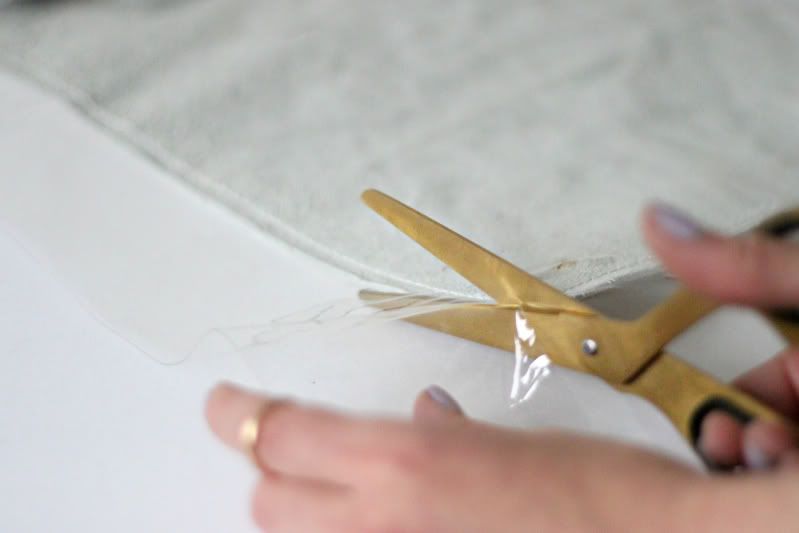
Stitch the plastic with the leather flap onto the main piece of leather, making sure the flap aligns at the top. When you're all done, cut off excess plastic around the edges. Finally, make two small incisions at the top of the main piece of leather for the button studs.
Subscribe to:
Comments (Atom)


