Awesome find tonight, I found another blog that has a ton of easy DIY fashion projects , this was just one of the many I fell in love with <3 Credit to: Gwen Mcmullin
DIY Cage Bra
Welcome to another DIY Friday. For the past couple of weeks I have been slacking on the diy posts but I'm back with a great one this week! Cage or cut out bralets/bras are everywhere at the moment. The sport luxe variety often come with several cross over straps and are worn to make a statement. These bras are worn to be seen.
I know Topshop have sold several over the past year all of which have been sell out designs and most certainly over the £30 mark. So I'm going to show you how you can make your own for much less. They are great for layering under sheer blouses or loose knits. A few carefully placed black lines can transform a top you thought you could never wear. I was inspired by Ivania's wonderful blog Love Aesthetics to create my own design and based it on many I've seen on the high street. A double triangle front with a T bar back.
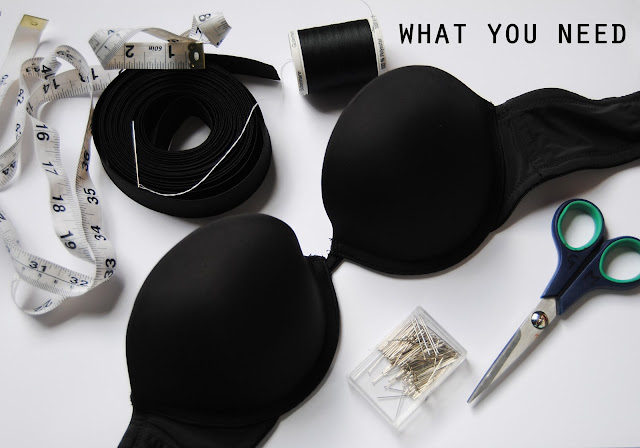
WHAT YOU NEED
.
Black 1 inch elastic - 3m
Needle & Thread
Strapless Bra
Pins
Measuring Tape
Scissors
.
001. Start by creating a design. It's a good idea to sketch out some ideas first. Wearing the bra, measure the amount of elastic needed for each strap. Remember you want the elastic straps to be taught so take an inch off your first measurement. This ensures there will be no slack straps.
002. Pin the elastic in place and using a needle and double thread, hand stitch across. Be sure to go over this a few times so it's nice and strong. Most bras are made from several layers of material so it's easy to make a stitch that can't be seen.
003. Keep adding straps to create your design. I have gone for a triangle shape on the front of my bra and a T bar strap on the back. Cut these to size by trying on the bra and measuring them symmetrically. Hand stitch adjoining straps firmly.
004. To add the T bar back strap find the center of your halter neck strap and attach a strip of elastic here. Stitch the other end to one side of the clasp area of your bra, making sure not to sew through to the metal fastenings. You should still be able to unhook and slide of your bra with no problems.


.


No comments:
Post a Comment